Tie-in Attachment Instructions
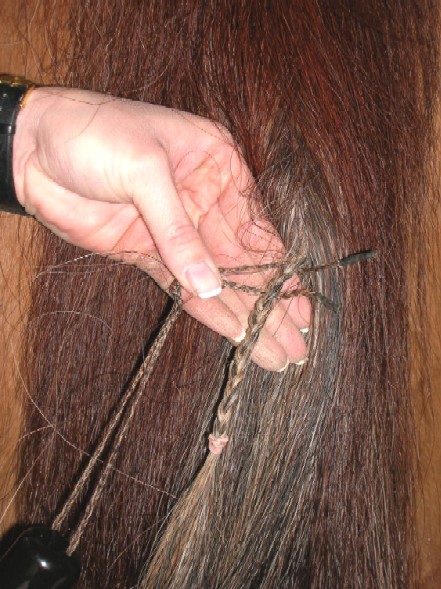
Braid a small section of hair at the bottom of the (approx 4-8 inches long). Be sure that the braid (approx the diameter of a pencil) is large enough to support the weight of the tail piece. Secure the braid with a rubber band.

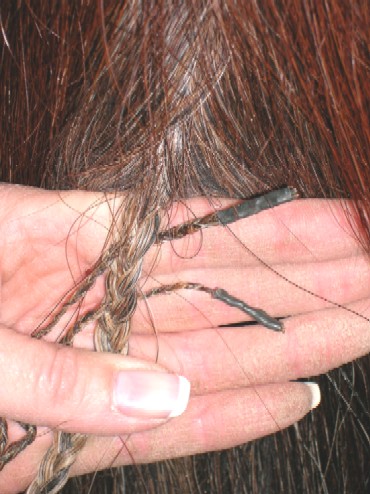
String the horses hair laces through the braided section as close to the tail bone as possible and tie snug.

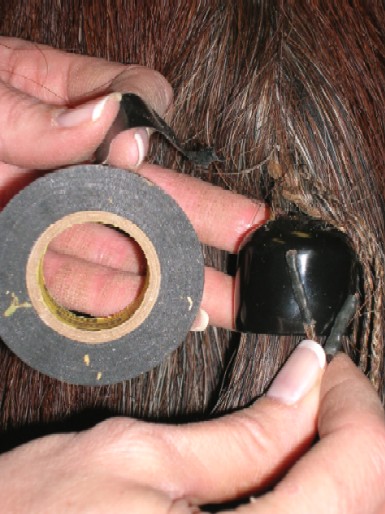
Now take the ends of the laces, fold them over and lay them against the extension top. To better secure the extension and to keep the laces from poking out, wrap a piece of electrical tape around the top.

The bottom of the tail extension should fall at about the horse's fetlock.

Some of your horse's natural hairs may be longer than the extension hairs. If this is the case, trim the hairs so that they are the same length.
The first time you attach the extension stand to the side and have someone slowly back the horse. If the tail starts to drag the ground STOP. (If the horse steps on the extension the laces will break). Check that the extension is tied as close to the tail bone as possible. If it is then we would recommend trimming the extension so that the horse can back without stepping on the extension.
Extension Care
All tails are 100% Natural Horse Hair and should be shampooed and conditioned regularly.
Blow dry and fluff your extension to give it a full look. To remove knots use your fingers or gently brush, DONíT PULL, your tail extension.
Do not leave your tail extension attached overnight. Remove the extension after your day of competition is complete.
With the Tie-in style, you may leave your braided section in overnight. However, the next day prior to attaching your extension be sure to check that the braid is still snug.
To maintain the health of your horseís tail, it is important that you remove the braided section at the end of the show weekend.